After Before
The staircase is complete! I am happy, but my husband is probably even happier because he won’t ever have to sand, ever, again! I really appreciate all of his hard work on this one.
Once I got into my groove and located the right tools, this job became a bit more manageable so if any of you are inclined to try this for yourself, make sure you purchase the two products listed below.

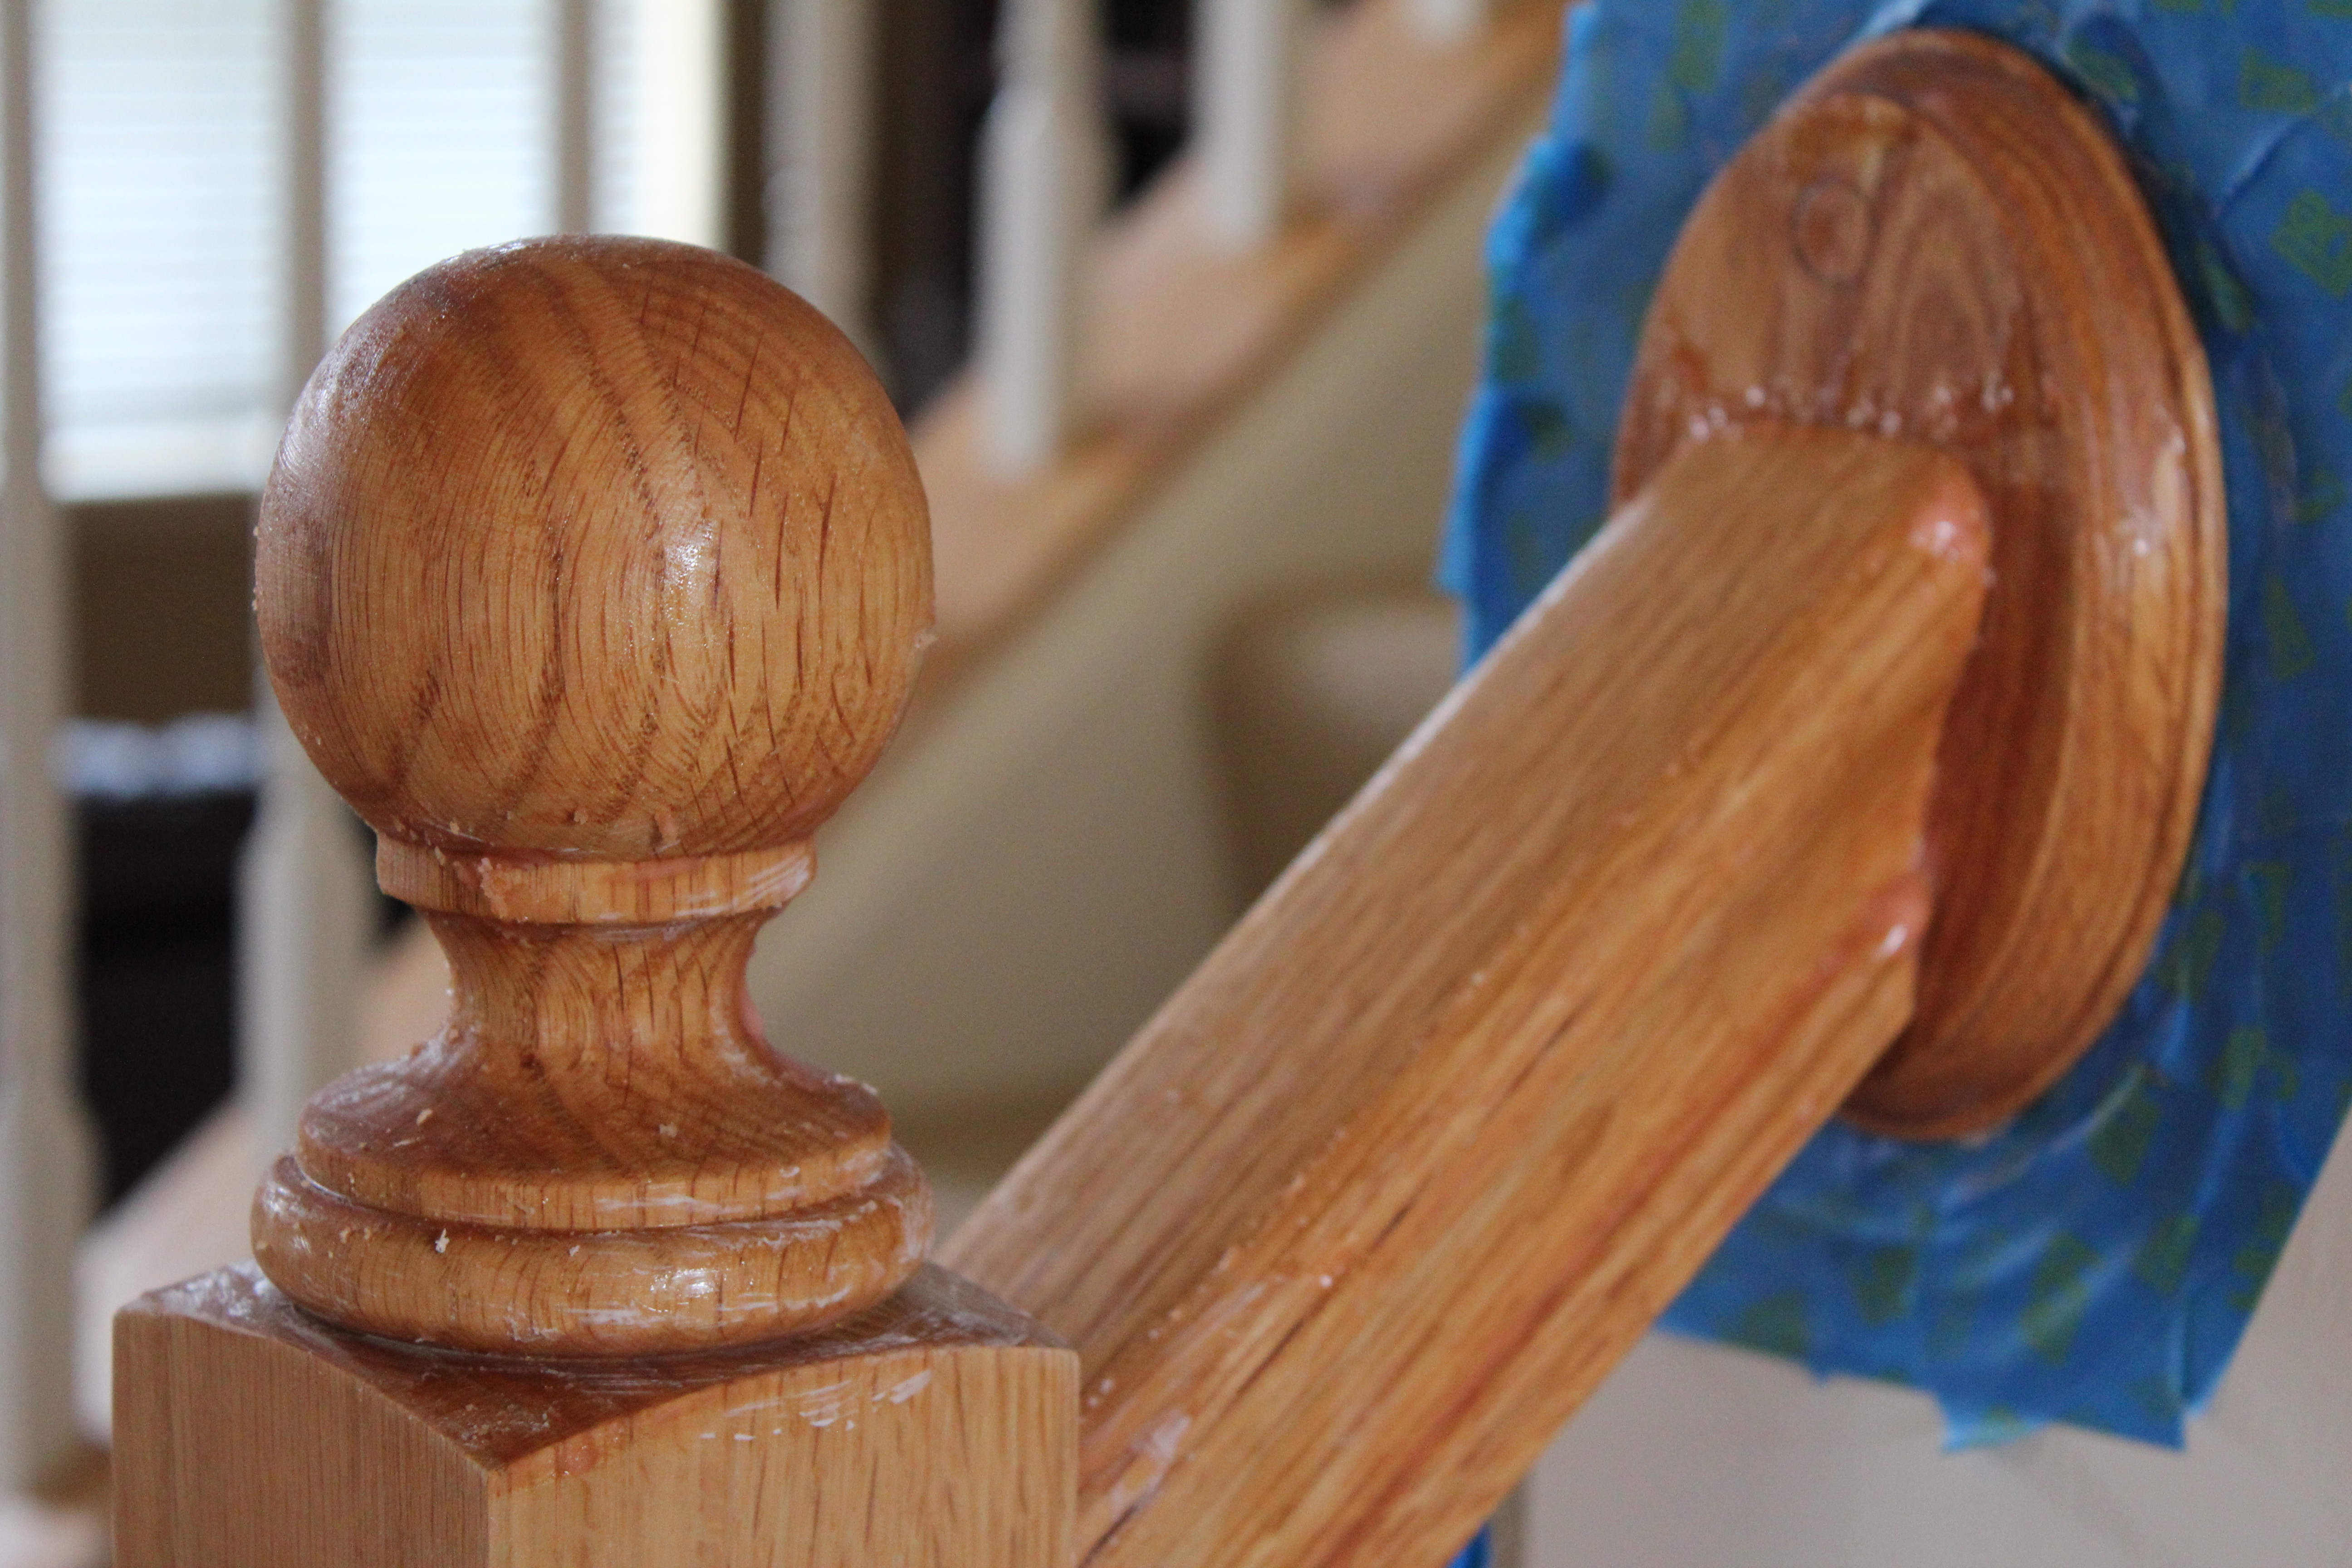
The first paintbrush I used did not give the railing an even, smooth finish. It also shed bristles all over the place. Messy. I found the paintbrush above at Menards by pure luck and I loved the results! The angle kept the stain from dripping and the bristles were great quality for the price at under $5 for the brush. An employee at Sherwin Williams recommended the protective film for our carpets and this made me breathe much easier while I applied the stain. The drips didn’t soak through like they would on a dropcloth.
I made sure to wrap painter’s tape at the top of all of my spindles and applied one coat of stain. Then I used some very fine steel wool and rubbed it all along the surface after it was completely dry. I used an old cloth to remove the debris from the steel wool and then I started staining again. In total, I did this process three times.
When the staining was done, it was time to work on the base of the staircase. I carefully cleaned any dirt or sanding dust between all of the spindles and applied one coat of primer. Next, I applied two coats of white paint.
Yay! I am so glad this is all done. I have to admit that while the tape was still on and I was nearly finished with staining, I was beginning to worry that the railing might be too dark, but now that it is all done, the results are fantastic and I am pretty pleased.


Before After
What are your thoughts? If any of you have ever tried doing something like this yourselves what were your results?