Home Is Where The Haggis Is

  • Home
  • About
  • Archives
  • Monthly Archives: September 2014

    • How Do You Like Them Apples?

      Posted at 9:00 am by Lisa Cavallari
      Sep 29th

      Apple Cupcakes

      If you are looking for an impressive way to use your abundant supply of apples this season, then look no further.  These apple cupcakes will knock the socks off any food-savvy guest.  I make these every fall for an annual apple tradition that started about six years ago.   My friend hosts dinner at her home and each of us brings a menu item that has apples as an ingredient.  I really don’t think I would be allowed in the door without them.  🙂

      Apple Cupcakes

      • Servings: 12 large and 12 mini cupcakes
      • Time: 1 hr 30 mins
      • Difficulty: moderate
      • Print

      Ingredients:

      Cake batter:

      3 cups all-purpose flour

      1 3/4 tsp cinnamon

      1 1/2 tsp baking powder

      1/2 tsp salt

      1/4 tsp ground allspice

      1/4 tsp ground nutmeg

      1/4 tsp baking soda

      1 cup (2 sticks) unsalted butter, room temperature

      1 1/4 cups granulated sugar

      3/4 cup packed brown sugar

      3 large eggs

      2 tsp vanilla extract

      1 1/2 cups unsweetened applesauce

      2 medium Fuji or Gala apples peeled, cored and sliced into small cubes

      Frosting:

      1/2 cup (1 stick) unsalted butter, room temperature

      8 ounces softened cream cheese

      1 Tb vanilla extract

      Pinch of salt

      3 cups powdered sugar

      Red food coloring

      Topping:

      2 containers of red sprinkles (I used Betty Crocker)

      12 brown Tootsie Rolls

      12 green Tootsie Rolls

      Directions:

      Line cupcake pan with red Wilton large cupcake liners.  Preheat oven to 350 degrees.  Whisk first 7 ingredients together into a large bowl.  Set aside.  Combine butter and sugar in a standalone mixer with paddle attachment until light and fluffy.  Add eggs one at a time, combining throughly between additions.  Add vanilla.  With mixer on low, slowly add 1/3 of dry ingredients, then add 3/4 cup applesauce.  Add 1/3 more of dry ingredients and follow with remaining applesauce.  Add last batch of dry ingredients, mix until combined.  Fold in chopped apples.

      Using a measuring cup add enough cake batter to each cupcake liner until it reaches the top.  Smooth tops with a butter knife and place in center rack of oven to bake for 35-40 minutes or until toothpick inserted comes out clean.  Add remaining batter to miniature cupcake liners and bake those for about 20 minutes.

      Allow cupcakes to cool thoroughly before frosting.  (Can be made 1 day in advance.)

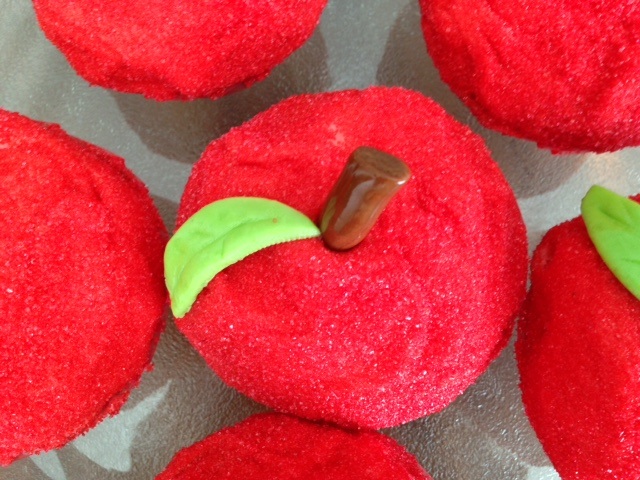
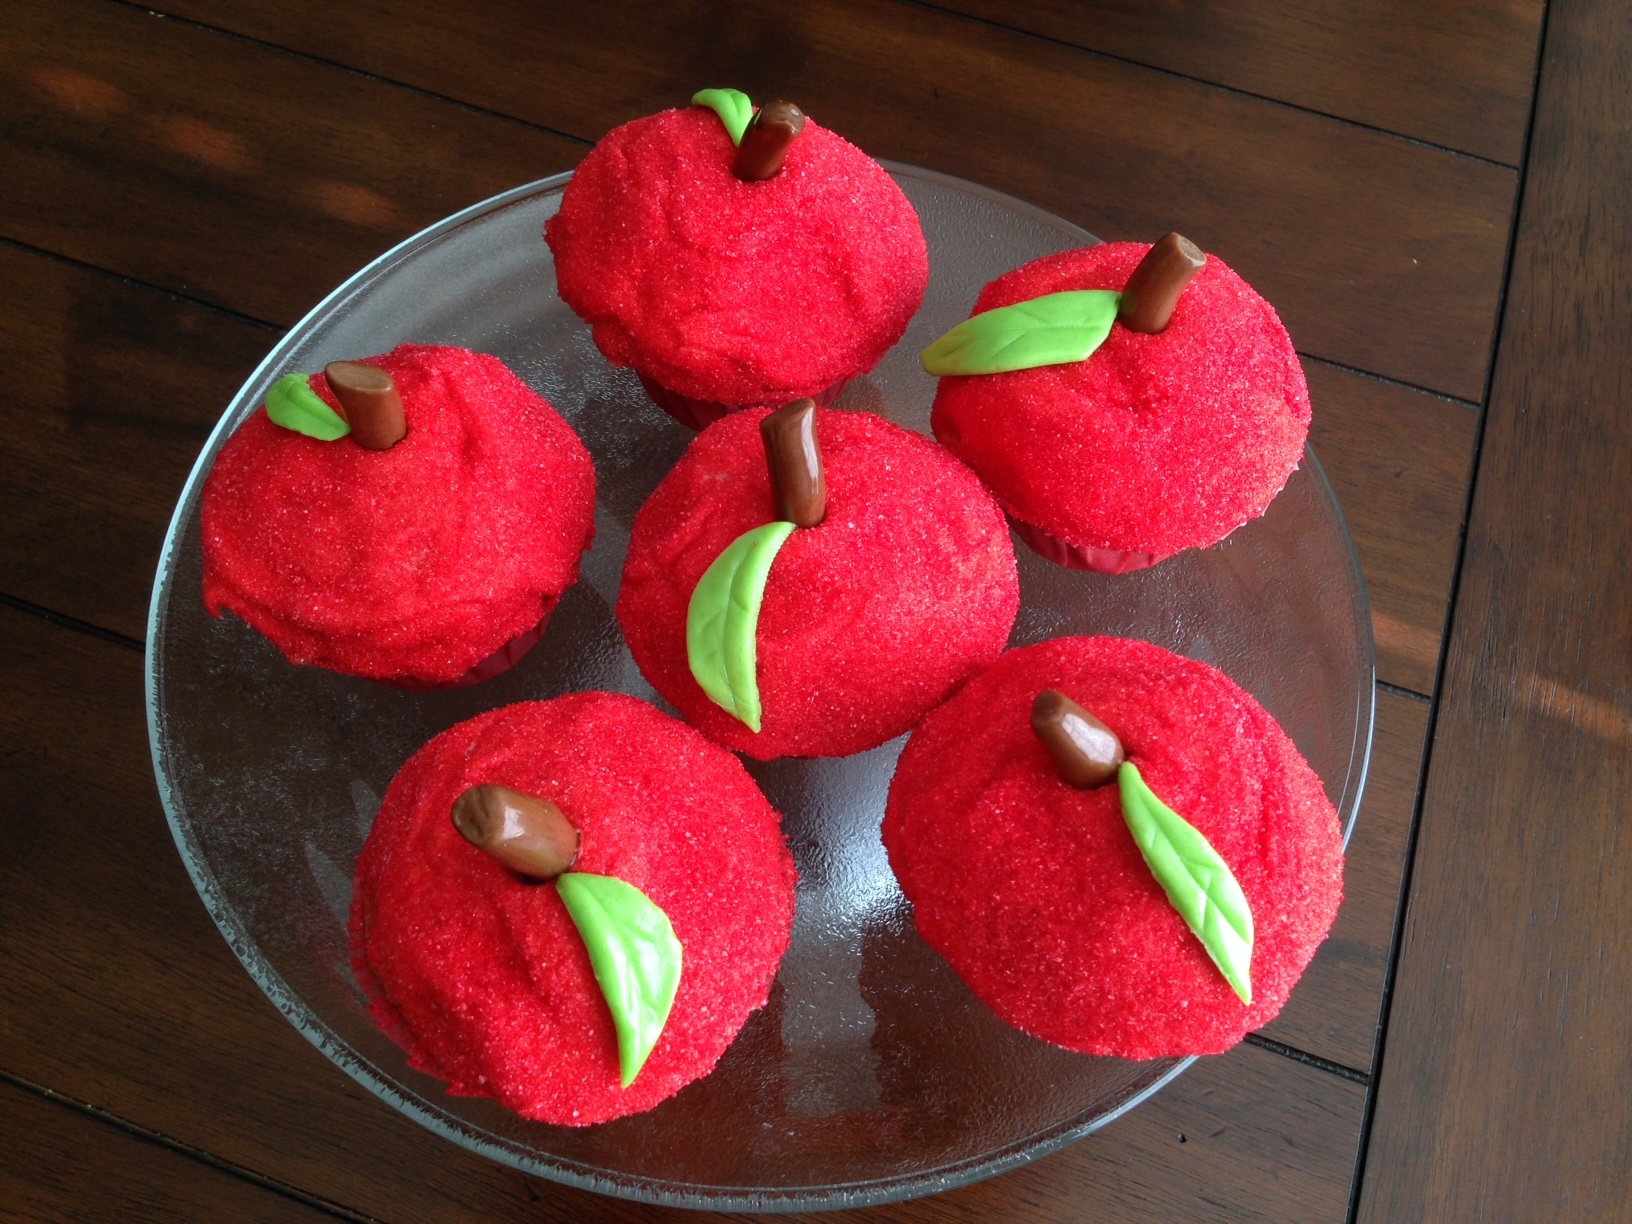
      For the frosting, add all frosting ingredients to a large bowl and mix until combined.  Tear off a sheet of paper towel and lay flat on countertop.  Pour all red sprinkles in center of paper towel.  Using an offset spatula, frost cupcakes one at a time.  Dip frosted cupcake immediately into pile of sprinkles rotating cupcake as necessary until all of top is covered in sprinkles.  Continue to frost and dip cupcakes until you have a shimmering dozen of red apples.  

      Lastly, take the brown Tootsie Rolls and shape into a stem shape.  You may need to microwave them for five seconds to soften them up a bit.  For the green Tootsie Rolls microwave for about five seconds each and use a rolling-pin to roll them flat.  Cut out leaf shapes with a knife and add details such as the veins.  

      Refrigerate cupcakes until a half hour before devouring.

      IMG_3889

      Apple Cupcakes

      Apple Cupcakes

      Apple Cupcakes


      Leaves


      Apple Cupcake Stand

      IMG_3898

      The apples obviously do not fall far from the tree.  

      Apple Cupcakes

      Share this:

      • Tweet
      • Share on Tumblr
      • Click to email a link to a friend (Opens in new window) Email
      • Click to print (Opens in new window) Print
      Like Loading...
      Posted in Baking | Tagged Apple Cupcakes, Apple Cupcakes With Cream Cheese Icing, Fuji Apple, Gala Apple
    • An Uplifting Experience

      Posted at 10:00 am by Lisa Cavallari
      Sep 22nd

      red-bra-fitting

      About a month ago, I was out with some friends when one of them spotted a woman walking into a restaurant with, what looked to be, the most painful bra underneath a sheer, white top she was wearing.  The bra acted like a corset because her skin was spilling out both over and under the straps on her back.  I wondered if she could even breathe in that thing.  My friend then turned to me and said, “You should really write about finding a good fitting bra.”

      Fast forward to this past weekend when I finally found the time to go shopping for one and here I am to share all the information I learned from a very wise and helpful salesperson named Gail at Nordstrom’s.

      First off, it was pretty funny to listen in on the exclamations and excitement whenever a shopper in a neighboring changing room found the right bra.  One woman was on the phone talking to her girlfriend about how shocked she was that she was a size G.  Honestly, I think the sizing at Nordstrom’s is just a carefully planned ego boost for the small-busted gal because I went up 2 cup sizes from my usual sizing.  Not that I’m complaining or anything.

      Usually I shop at Victoria’s Secret for my bras so I was surprised by the quality and variety offered at Nordstrom’s, not to mention their outstanding customer service.  I think it’s safe to say that VS bras are a thing of the past for me now.  Some of my favorite brands that I tried on were Josie (the fabric they use is so soft), Black Bow (again very soft fabric, but also great patterns and enhancements for the smaller-busted), Chantelle (dreamy, romantic, lacy and French) and OnGossamer (very cool twist in the center of the bra that can be twisted again for more oomph).  Let me also state that they were having some great sales that day so I ended up buying 3 bras with the original intent of getting just one.

      Here are a few misconceptions we have about bras.

      Myth: No one can see what I have on underneath my outfit so I’ll buy something more noticeable like a new shirt, shoes, etc and get a few more months out of my old bras.

      Truth: Nuh-uh!  Your clothes will fit better when you find the right fitting bra by lifting the girls up and smoothing out the dreaded back flab, plus your posture looks better too.  

      Myth: Speaking of back flab, that means my bra is too tight.

      Truth: No, it actually means that your bra is too loose.  Wearing a bra with a smaller band size and lower on your back will eliminate back fat.

      Myth: When trying on bras, I want the band size to fit me at the middle or the loosest hook so that it’s more comfortable.

      Truth: You want the band size to fit you perfectly on the loosest hook because your bra will stretch out with time and wear.

      Myth: I only need one or two bras.

      Truth: You need to rotate around 3-4 bras during the week making sure your bra has a day to rest in between wearings.  Giving your bra a day of rest will allow the resilience to come back in the support elastic.   Taking care of your bras can extend their life by using gentle detergent and a lingerie bag in the wash.  Always allow your bras to air dry.

      Myth: My straps keep falling down.  I just need to tighten them.

      Truth: If you tighten the straps and they still fall down, that means your bra band is riding up and you need to go down a band size.  Your band should fit straight across your back and it should never ride up.

      Myth: I’ve been fitted for a bra within the past year or two so my size probably hasn’t changed.

      Truth: We all know that pregnancy, breast-feeding and ever-changing exercise and eating habits have an impact on our bust size so it’s best to get measured each time you buy a bra.  

      Since 3 out of 4 women are wearing the wrong bra size, take a look to see how your bras are fitting.  You may have some shopping to do in the not-too-distant future.  If you are in the area and looking for a bra, go see Gail at Nordstrom’s in Woodfield.  She is an excellent resource.

      Are there any questions I might have missed on this topic?

      Thanks Sylvia for offering up this idea.  🙂


      Share this:

      • Tweet
      • Share on Tumblr
      • Click to email a link to a friend (Opens in new window) Email
      • Click to print (Opens in new window) Print
      Like Loading...
      Posted in Shopping
    • Fall Fever

      Posted at 9:00 am by Lisa Cavallari
      Sep 10th

      IMG_3871

      Autumn is practically here.  The chill is supposed to set in slightly this week in Chicagoland and the temperature has turned noticeably cooler in the evenings.  I am hoping to get one more batch of pesto out of my basil before it turns completely brown.

      Inspiration struck over the weekend to take out some of my fall decorations when I saw that a friend had put hers out.  Thank you for the motivation, Debbie.  😉  Except this year, I wanted to show some more restraint.  In the past, I have admittedly gotten carried away with my fall decorating.  It looked like a Halloween store/leaf storm blew through the house.  Part of it is for the kids and the outdoor decorations will still be out in full force, but some rooms I plan to keep Halloween-free because, let’s face it, it’s not relaxing decor, is it?  A skull blinking on and off or a witch staring at you while you eat dinner.  It can be a little unsettling for guests.

      IMG_3882

      I saw a butcher block decorated for fall on Pinterest and decided to recreate the look.  The only thing I am missing is a basket below and a copper bowl or pitcher with some gourds.

      IMG_3873

      Here is our mantle.  I am not entirely happy with the duck decoy in the middle, but I will keep playing around with it.

      IMG_3874

      A close-up of the bittersweet I bought from Pottery Barn many moons ago.  I love bittersweet.

      IMG_3872

      A few children’s classics that belonged to my dad when he was growing up and an NFL Throwback helmet.  Voila.  Subtle fall touches.

      What do you like to put out when the seasons change?  Get the house cozy now because it sounds like this winter is going to be a doozy!


      Share this:

      • Tweet
      • Share on Tumblr
      • Click to email a link to a friend (Opens in new window) Email
      • Click to print (Opens in new window) Print
      Like Loading...
      Posted in diy | Tagged Fall Decorating, Fall Decorating Ideas, Fall Mantle
    • Preserving Summer

      Posted at 9:00 am by Lisa Cavallari
      Sep 1st

      Canning Pickles

      Labor Day Weekend is always bittersweet.  I look forward to cozy sweaters, vibrant colored trees dotting the landscape and my favorite of all holidays…Halloween!  BUT, I will miss being able to slip on sandals effortlessly and enjoy days at the pool and park.

      This post is like Canning 101 for anyone who has never attempted the canning process before.  It is really not that complicated and when you hear the popping sound when the first jar sealed you will be hooked.  I took a class last summer that went over the basics like pickling cucumbers, making raspberry jam and a wonderful peach chutney so I am passing some of what I learned along to you.

      A few tools you will need :

      A plastic funnel

      Rubber tongs to submerge and remove the jars from the water bath

      Mason jars, lids and screw caps

      A large stockpot

      (I bought these items at Ace Hardware.  They are usually on sale this time of year.)

      Bread and Butter Pickles

      Makes 5 pint jars

      Ingredients

      8 cups sliced pickling cucumbers

      1 onion thinly sliced

      2 Tbs kosher salt

      2 cups cracked ice

      2 1/2 cups cider vinegar

      2 1/4 cups granulated sugar

      1/2 tsp turmeric

      1 tsp celery seeds

      1 Tbs mustard seeds

      1/8 tsp red chili flakes

      1/2 tsp black peppercorns

      3 bay leaves, crushed


      Directions:

      1.  Start by chopping your onions and pickling cucumbers and toss them into a bowl.

      2.  Add your salt and ice into the bowl and mix well.  Place another bowl with water or a heavy can on top and allow to sit at room temperature for 3 hours.

      3.  While the cucumbers and onions marinate, you can wash and sterilize your jars and lids.  I place the jars on a sheet pan and put them in a 225 degree oven for a half hour.  Note: the jars must be hot when you add the brine mixture or else they can crack.

      4.  To make the brine, combine the vinegar, sugar, turmeric, celery and mustard seeds in a large pot and bring to a boil.  Put a large separate pot on to boil with 6 inches of water.

      5.  Drain the cucumbers and onions and add them to the brine.  Bring it back to a full boil and immediately turn off the heat.

      6.  Evenly distribute the chili flakes, peppercorns and bay leaves between the jars.

      7.  Place the cucumbers and onions into the jars, packing them down tightly.  Fill the jars with the brine, leaving 1/2 inch of headroom.  Use a chopstick or knife to take out any air bubbles.

      8.  Wipe the rim and place the lid on the hot jar.  Carefully set the jars in the pot of hot water using the rubber tongs.  Cover and bring to a boil and process for 10 minutes.

      9.  Remove jars carefully from the water bath.  Place them on a wire rack to cool.  Make sure the jars seal properly.  You will hear the popping sound when that happens.  If they have not sealed, you can always place the pickles in the refrigerator and enjoy immediately.  For the ones that seal, place them in a cool, dry place and away from light.  Give them as gits this holiday season!

      Wait one week to enjoy your pickles.


      Pickling Cucumbers

      Pickling Cucumbers

      Sterilizing Jars

      IMG_2651

      IMG_2661


      And the winner is…..

      Congratulations to Carrie for winning the NFL football!  Stay tuned for more giveaways.

      Share this:

      • Tweet
      • Share on Tumblr
      • Click to email a link to a friend (Opens in new window) Email
      • Click to print (Opens in new window) Print
      Like Loading...
      Posted in Cooking | Tagged Bread and Butter Pickles, Canning, Pickling
    • Recent Posts

      • Know The Signs
      • Popovers
      • Wine On Wednesday: Pride
      • Chicken Piccata
      • Skillet Chocolate Chip Cookie
    • Categories

      • Wine (47)
      • Baking (41)
      • Cooking (31)
      • Holidays (16)
      • Kids (16)
      • Shopping (10)
      • diy (10)
      • Uncategorized (8)
      • Travel (7)
      • Health (5)

Start a Blog at WordPress.com.

  • Subscribe Subscribed
    • Home Is Where The Haggis Is
    • Join 82 other subscribers
    • Already have a WordPress.com account? Log in now.
    • Home Is Where The Haggis Is
    • Subscribe Subscribed
    • Sign up
    • Log in
    • Report this content
    • View site in Reader
    • Manage subscriptions
    • Collapse this bar
 

Loading Comments...
 

    %d